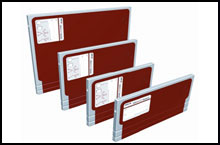
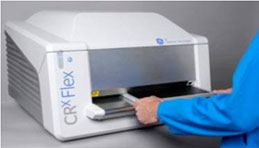
Computed Radiography (CR)


Computed Radiography (CR) uses phosphor-imaging plates instead of film to store radiographic inspection results. CR imaging plates are exposed as per standard radiographic testing, but the images are laser scanned from the plates into a computer system. Using powerful software one can then analyze, print and store the images for future review.
Computed Radiography has various advantages over conventional radiography.
1) Developing time of film is eliminated in this technique. After exposure, scanning of an imaging plate takes less than one minute. This makes radiography testing much faster.
2) Permanent record will be stored in digital format.
3) The images can be readily shared, e-mailed and stored electronically by anyone needing reliability information for the equipment.
4) Defect size can be measured accurately using different tools provided by software, which increases confidence of inspector.
5) The imaging plates practically eliminate re-shots by providing a greater range over which exposures can be useful.
6) Significant exposure reductions
7) Reduction of exposure times from 50-70% when using IR 192
8) Similar or better results are obtained when utilizing Se 75, Co60 and X-rays
9) Highly reproducible
10) Data is stored for future comparison or audit
Computed radiography can be used for testing of weldings and casting.
- Our Services
- Radiographhy Testing
- Ultrasonic Testing
- Dye Penetrant Testing
- Visual Inspection
- Magnetic Particle Testing
- Welding Inspection
- Level-III Consultancy
- Computer Radiography
 |
 |
Computed Radiography (CR)
Computed Radiography (CR) uses phosphor-imaging plates instead of film to store radiographic inspection results. CR imaging plates are exposed as per standard radiographic testing, but the images are laser scanned from the plates into a computer system. Using powerful software one can then analyze, print and store the images for future review.
Computed Radiography has various advantages over conventional radiography.
1) Developing time of film is eliminated in this technique. After exposure, scanning of an imaging plate takes less than one minute. This makes radiography testing much faster.
2) Permanent record will be stored in digital format.
3) The images can be readily shared, e-mailed and stored electronically by anyone needing reliability information for the equipment.
4) Defect size can be measured accurately using different tools provided by software, which increases confidence of inspector.
5) The imaging plates practically eliminate re-shots by providing a greater range over which exposures can be useful.
6) Significant exposure reductions
7) Reduction of exposure times from 50-70% when using IR 192
8) Similar or better results are obtained when utilizing Se 75, Co60 and X-rays
9) Highly reproducible
10) Data is stored for future comparison or audit
Computed radiography can be used for testing of weldings and casting.
 |
 |
||
 |
 |
||
 |
NDT Services
Quality NDT Services has provided Computed Radiography Services to HPCL Mumbai Refinery for thickness measurement and pitting analysis of insulated pipes. For this application special software named Rhythm is used.
There are a number of methods used for the inspection of corrosion under insulation. The main methods are –
1) Insulation removal
2) Ultrasonic spot readings
3) Computed radiography
- 1) Insulation removal –
- i) The most effective method is to remove the insulation, check the surface condition of the pipe, and replace the insulation.
- ii) This is also the most expensive method in terms of cost and time lost.
- iii) Process related problems may occur, if the insulation is removed while the piping is in service.
- .
- 2) Ultrasonic spot readings –
- i) This is an effective method, but limited to a small area.
- ii) It is expensive to cut the insulation holes and cover the holes with caps or covers. It is not practical to cut enough holes to get a reliable result.
- iii) The inspection holes cut in the insulation may compromise the integrity of the insulation and add to the corrosion under insulation problem, if they are not recovered carefully.
- iv) No permanent record will be available of UT testing.
- 3) Computed Radiography –
- Computed radiography (CR) is used to assess internal or external corrosion/erosion losses in process piping, pressure vessels and valves. Based on it, one can estimate remaining thickness and wall losses.
- Computed radiography can be used in piping for internal corrosion, for corrosion under insulation (CUI) and for localized losses (such as those which develop in Sulphuric acid service); Valves and their internals for internal or external corrosion/erosion; Piping and valves for build-up of products and for blocks; for losses in boiler tubes at temperatures of the order of 350 ⁰C (662 ⁰F); asbestos insulated equipment and assess losses around the circumference.
- In past, conventional film radiography with Profile technique was used for thickness measurement, resulting in difficult and unreliable results.
- The wall thickness, manually measured on a film took into account the visually detectable wall edges. These visually detectable wall edges however are sometimes undetectable due to the limitation of film dynamic range.
- These drawbacks of radiography have been overcome by Computed radiography.
- This system provides more accurate and reliable measurement than any other technology.
- Do not need to remove insulation of pipes.
- More accurate than Ultrasonic Testing.
- Wall thickness as well as internal structure of pipe can be observed in image, which helps to find out pitting in pipe.
- Can be performed on running plant.
